This comprehensive book explains the basics of segmented turnings. It also contains examples by some of world's top turners. Keeling also covers the evolution of segmented wood turning technology, as well safety and health concerns when working with wood. The book features 10 projects with increasing difficulty as well a gallery of inspiring segmented design examples. While the book aims to teach beginners about the fundamentals of segmented turnings, it is not intended to be a comprehensive resource for those looking to create the finest-looking turniment.
Techniques
William Smith explains how to make segmented wood turned objects in Techniques for Segmented Turnings. This woodworking method is very effective at creating intricate vessels. This method is especially well-suited to beginners. You should be familiar with basic woodworking skills before you begin. It is a good idea to have some experience with turning. You can learn the basics and then move on to more advanced techniques.
Materials
There are many options for creating segmented woodturns. There are three options: ring construction, stave construction or solid non-segmented. Wood expands in an opposite direction to its grain so the turner needs to consider non-parallel grains directions and take precautions not to cause damage. This book will give you an overview of the various styles and types you can use to turn wood.
Feature Rings
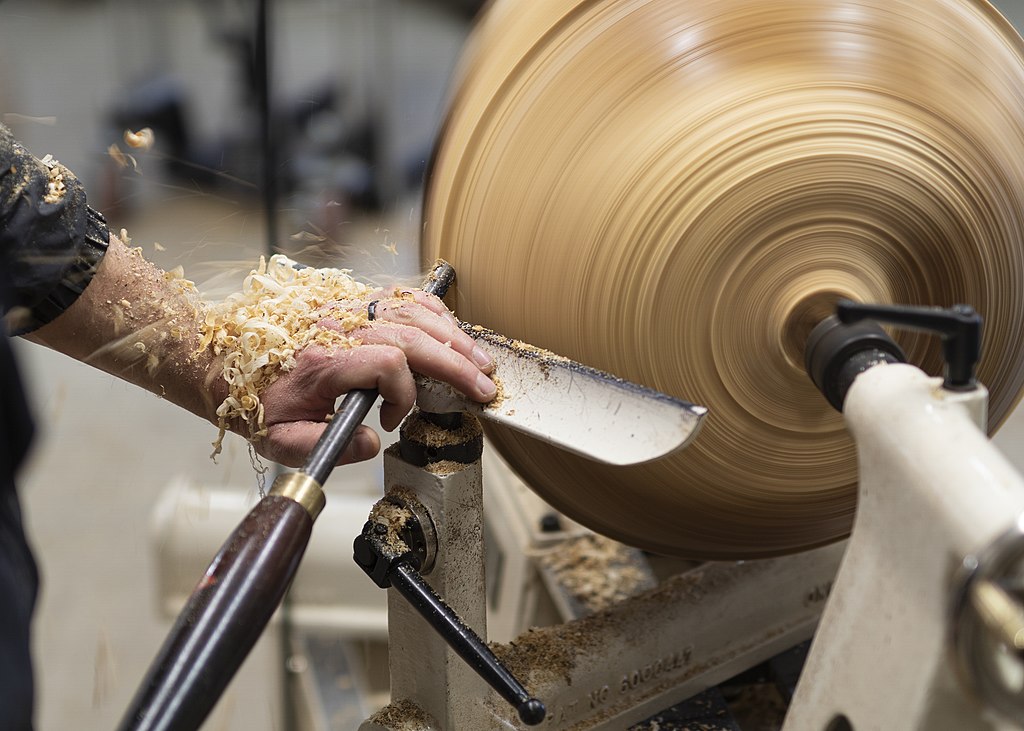
Many segmented bowls have a feature called a Feature Ring. The segmented bowl's ring is created by the lightning-like design of the zigzag element turning on its sides. The final turning is sanded at 600 grit. Finally, clear lacquer is applied to the surface. These ring shapes make great gifts or home decor. This 120-minute DVD shows you how segmented dishes can be made.
Ring construction
There are several methods of creating rings for segmented lumber turnings. These include using both stave construction and ring building. This technique is also applicable to solid non-segmented lumber. Wood expands perpendicularly to its moisture content and grain. When designing the segmented turn, the turner must take into account non-parallel grain orientation.
Stave construction
Segmented wood turning can be done in two main styles: ring or stave. For some projects, the ring construction is the most popular. However, stave construction can be more prevalent. While each style has its merits, ring is the most popular and easiest to accomplish. This article will discuss the differences between stave and ring construction and how you can apply them to your next segmented job.
Solid wood
Accuracy in miter angles is critical when making solid wood segmented turns. The size of the segments can vary depending on their width. When gluing segments together, you must use PVA wood glue with end grain against the grain. You can glue two segments together at once. Clamping rings with hose clamps can be used to hold them together. A miter angle of 22.5 degrees should be used for every eight segments.
Floating base
You should avoid using a flat, or sloping, base for segmented woodturns. A floating base will minimize stress and prevent the base from bursting. Floating bases can be made from a half-mortise joint where a solid disc fits in the gap, allowing the wood to move freely. Floating bases also have a high level of stability, especially if you use quarter-sawn lumber. You should make a floating base that is less than 6 ins.
FAQ
What is the difference of plywood and particleboard?
Plywood is made of layers of wood that are pressed together under pressure. Plywood can be cut to different thicknesses. It's commonly used as flooring and cabinets. Particle board is made up of sawdust mixed in resin, then compressed into large pieces. This board is commonly used in home improvement projects. Both types of boards are durable and easy to cut.
Where can I purchase woodworking supplies
There are many places where you will find everything that you need. You can visit your local hardware stores, or you can look online at sites like Amazon.com.
You might also consider flea markets and garage sale for any old furniture or other materials you could reuse.
Are you a genius in order to master woodworking?
No. No. Woodworking isn't rocket science. Anyone can learn to use basic powertools and techniques to create beautiful work of art.
Is it easy to start a woodworking business?
It can be difficult to start your woodworking business. There are many requirements and regulations that must be followed. This doesn't necessarily mean that you should go through all the work of setting up a company. Many people choose to join existing businesses. This way, you only need to pay membership fees and taxes.
How often do I need to buy new supplies
Some tools will need to be replaced over time. Hand tools will need to be sharpened regularly. For power tools, replacement parts will be required frequently. Avoid buying too many products at once. Spread your purchases out over several months.
Where can I buy hardwood lumber?
Home Depot sells hardwood lumber. You will find a range of wood products available at Home Depot.
A large variety of engineered hardwoods is available to them, including Ipe (Araucaria Angustifolia), Brazilian Cherry and Peau d'Arco.
These woods can be found online by searching for "hardwood lumber" in Google.
Statistics
- Average lumber prices rose about 600 percent between April 2020 and May 2021. (familyhandyman.com)
- If your lumber isn't as dry as you would like when you purchase it (over 22% in Glen Huey's opinion…probably over 10-15% in my opinion), then it's a good idea to let it acclimate to your workshop for a couple of weeks. (woodandshop.com)
- Woodworkers on the lower end of that spectrum, the bottom 10% to be exact, make roughly $24,000 a year, while the top 10% makes $108,000. (zippia.com)
- In 2014, there were just over 237,000 jobs for all woodworkers, with other wood product manufacturing employing 23 percent; wood kitchen cabinets and countertop manufacturing employing 21 percent. (theartcareerproject.com)
External Links
How To
How to drive a nails in wood
First, choose the right size and type of tool to drive a nail through wood. Claw hammers include mallets, claw hammers (sledgehammers), mallets, ball-peen hammers, hatchets, and mallets. Each type of hammer comes with its advantages and disadvantages. A clawhammer works best when hitting something hard like nails. However, it can sometimes be difficult to see exactly where the strike is going. The sledgehammer works well for large areas, but is too heavy for smaller tasks.
Once you have chosen the right hammer for you, put your hand flat against its side so that it rests comfortably in the palm of your hand. You can grip the handle with your fingers, but not so tight that it causes injury. Hold the hammer straight up, keeping your wrist relaxed. Now, move the hammer towards the center of the nail by swinging it back. You should feel the impact of the hammer striking the nail. Try practicing with a block to help you master the art of swinging a stick.
The hammer should be held close to your body when you are ready to begin driving the nail. Position the nail, so it's perpendicular to the surface of the wood. Your eyes should be focused on the nail's tip. Swing the hammer forward, and then move the hammerhead. Keep doing this until you are comfortable with the swing. Try adding power to your swings when you've mastered the technique. Hold the hammer high above your shoulders and pull it down. This will allow you to exert more energy.
Once you have successfully drilled the first hole in the nail, remove the hammer. Use a pry bar or screwdriver to pull out the rest of the nails. To prevent splitting the wood, ensure you keep the nail heads flush against the board's surface.