
There are many types dovetail tools. Dovetail tools are usually made with an included angle 90 degrees. In the figure 3, you can see two 0.100 inch-dia. You can choose from different neck sizes and angles for dovetail tools. These tools are versatile and available in a range of sizes. I will be discussing the differences between these types and how they compare.
Dovetail milling cutter
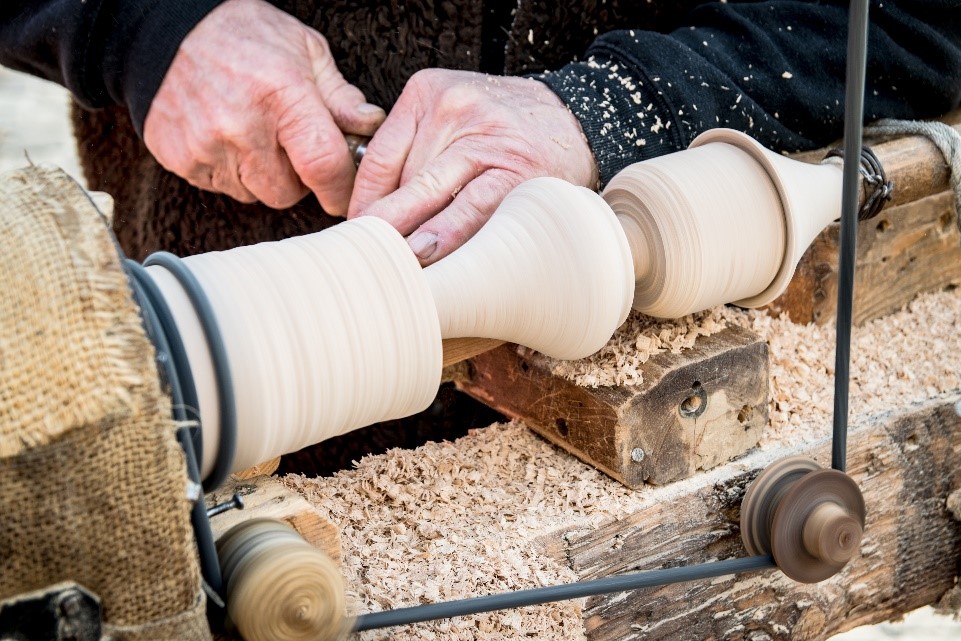
Dovetails refer to pieces of wood that have been arranged parallel on a lathe. These are also known by the name jigs. They are used in manufacturing, but not in automotive. In fact, dovetails are the most common woodworking tools. But, the dovetail lathe tool is not just any woodworking tool. It is also used to make optical systems.
Dovetail milling cutters are a type of chamfering instrument used to create reliefs or bevels on the stock's underside. This tool can also be used as a deburring tool to flatten aluminum. These tools are often micro-grain carbide and come in a variety of lengths, geometries, and cutting diameters.
For holding small pieces of workpieces, vices can be used in conjunction with dovetail lathes. These vices can be set up for machining on a table at an angle of up to 90 degrees. Dovetails may also be made in the reverse direction. The first dovetail must always be cut parallel to it, while the second must be 90 degrees from the original.

Dovetail lathe tools are often too large for the size of their dovetails. This results in inaccuracies in surfaces, and sometimes instantaneous tool failure. Dovetail cutters, however, are smaller than the standard end-mill and have a smaller neck. Dovetail tools, in other words, should not be used without care.
Dovetail chisel
A dovetail chisel is a great tool to make your job easier and ensure the joint is perfectly flat. A good dovetail saw will allow you to get a better angle for cutting dovetail tailboards. Ashley Iles' dovetail chisel is a great choice. It has a triangular cross section, and plenty of flexibility for easy use. These chisels come with an oil cloth as a base.
Using a good dovetail chisel will help you create a dovetail recess quickly and efficiently. The blade's triangular shape allows you to fit the blade into the tightest corners. While its hollow back gives it maximum holding power, it has a triangular cut. Lastly, the chisel comes with a handy mark out scale for determining the correct diameter for the dovetail.
An umekinomi is another dovetail chisel. This Japanese traditional chisel can remove waste from dovetails. The tool has a triangular crosssection and narrow edges. Its blades are made of a combination hard high-carbon Hitachi steel on the front and soft steel at the back. The blades are made by a master blacksmith in Japan, Takao Shibano, and are backed by over 50 years of toolmaking experience.
Nova Dovetail Chisel
You need a high-quality dovetail chisel to get the most from your dovetail lathe. Nova Dovetail Chisel makes the dovetail recess that will fit into your dovetail teeth. This chisel has a unique shape that ensures maximum holding power for the dovetail chuck. You may not find the same dedicated shape on other chisels, which could result in poor dovetail form or improper seating of your jaws. The handy scale on the chisel measures the exact size of the dovetail recess. It cuts dovetails in both 50mm (2") & 100mm (4") jaw set.
The NOVA Dovetail Chuck Accessory lets you make a dovetail hole for your dovetail chucking. The NOVA Accessory Jaws match perfectly, ensuring a precise cut with a comfortable grip. The NOVA Dovetail Chisel is made by Teknatool International and is backed by a two-year replacement warranty.
Another benefit of the Nova Dovetail Chisel for the dovetail lathe is that it is easy to use. It doesn't require the Turner to maintain the bevel edge of the dovetail chisel. This is the hardest part of dovetail machining. Its design also makes it suitable for beginners and experts alike. The Nova Dovetail Chisel can also be easily sharpened.
FAQ
How do I determine what kind of wood my project is made from?
Always read the label when purchasing wood. It should have information about the wood species as well its moisture content and whether any preservatives were used.
Which wooden items are very popular?
These wooden products are the most popular. They were made from sustainably harvested wood.
The most popular types of wood for furniture include oak, maple, cherry, mahogany, walnut, and teak.
These woods are strong and durable, with beautiful grain patterns. If they are well cared for, they can last many years.
To protect wood furniture from moisture damage, it should be painted first. This applies to all surfaces, even drawers and doors.
Paint that is water-resistant will ensure furniture lasts for a long time.
It is recommended to use an oil-based primer, then apply two coats. Depending on how often it will be worn, you may need to apply several coats.
Avoid spray cans and aerosol paints. These products have solvents that evaporate quickly, leaving behind dangerous fumes.
How long does it take to finish a piece of furniture?
It depends on the size and condition of the furniture. You can finish smaller projects, such as boxes or picture frames, in one day. Larger projects such as tables and desks can take several days to complete. It takes time to properly stain and seal wood.
How long does it take to finish a piece of furniture?
It depends on the type and complexity of your design as well as the amount of finishing that you use. Hardwoods are more difficult to maintain than softwoods. Hardwoods are also more expensive than softwoods. However, they are stronger and more resistant to moisture. It takes between one and three months to finish a piece.
What would you recommend as a starting material for woodworking?
You can start with softwoods like pine or poplar. When you feel confident with these two, move on towards hardwood.
Are you able to teach yourself woodworking
It is best to do it yourself. Woodworking takes practice, skill, patience and experience. It takes time to master any craft.
Learning how to do something is best done by doing it. Start small, and work your way up from there.
Statistics
- If your lumber isn't as dry as you would like when you purchase it (over 22% in Glen Huey's opinion…probably over 10-15% in my opinion), then it's a good idea to let it acclimate to your workshop for a couple of weeks. (woodandshop.com)
- In 2014, there were just over 237,000 jobs for all woodworkers, with other wood product manufacturing employing 23 percent; wood kitchen cabinets and countertop manufacturing employing 21 percent. (theartcareerproject.com)
- Overall employment of woodworkers is projected to grow 8 percent from 2020 to 2030, about as fast as the average for all occupations. (bls.gov)
- Woodworkers on the lower end of that spectrum, the bottom 10% to be exact, make roughly $24,000 a year, while the top 10% makes $108,000. (zippia.com)
External Links
How To
How to make wood joints
This tutorial will show how to join 2 pieces of wood together. We will use the pocket hole joint, which is drilling holes in the wood to join them. This method works great if your wood is straight and smooth. You may want to consider other methods, such as dowel joining. These are the steps
-
Drill Pocket Hole Joints. To start, measure and mark where you want to put the pocket hole joint. Use a jigsaw or handheld drilling machine to drill 3/8 inch deep holes at the ends of each wood piece.
-
Sand Smooth. Sanding the edges of the wood will help to prevent the joint from splitting later.
-
Glue the two sides of the wood together. Apply glue on both sides of the wooden plank. Allow the wood to rest for five minutes before clamping it together.
-
Attach the Pieces together. After the glue has dried you can attach the pieces to form a flush joint.
-
Trim Joinery. Trim any excess wood surrounding the joint once the glue has dried completely.
Make sure to leave enough room between the pieces so that you can turn them inside and out.