
This article covers all the issues you might face when cutting curves in a bandsaw. You'll also learn about bandsaw blade types and proper tension. When you finish this article, you will be an expert in cutting curves on a Bandsaw. This tool is invaluable in any workshop. Continue reading to learn the safest and most effective ways to use a chainsaw.
Problems cutting curves on a bandsaw
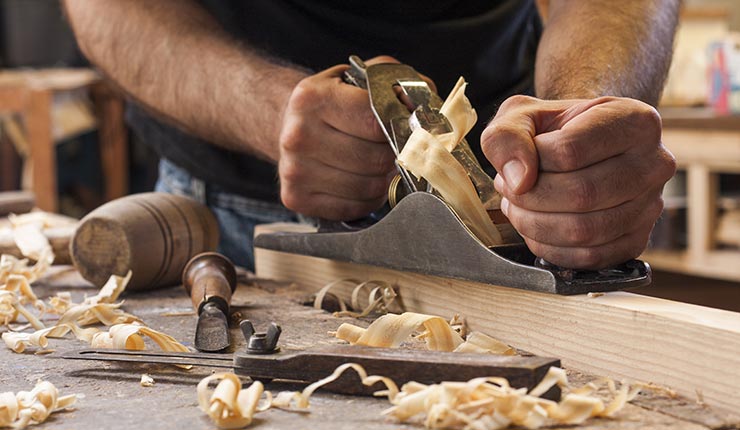
If you're having difficulty cutting curves on a bandsaw, it is important to learn how to feed the wood into the saw. You can only rotate the workpiece and cause damage to the blade by twisting it. It's similar to turning the steering wheels, but you won’t get out from the parking lot. To allow the blade to curve, push the piece forward.
There are many reasons why bandsaws may stop cutting straight. These include the incorrect blade or improper tension. Proper blades, proper attachments and lubricant can resolve these problems. These simple fixes can save you from costly repairs. If the problem continues, you might need to replace your bandsaw. You can find simple solutions to most bandsaw issues.

Safety precautions
A bandsaw makes it easy to cut wood into complex shapes. The blades are designed for perfect cutting on wood and even curves in wooden blocks. Although bandsaws have a high level of effectiveness, there are some safety guidelines that can help to reduce injury. These guidelines will help you ensure safe curve cutting with your bandsaw. Follow these safety tips while using a bandsaw.
Use proper lighting to operate your bandsaw. You should stand firmly at the band saw and avoid distractions. Horseplay should not be done while operating the bandsaw. Never leave the machine running until the job is done. Remember to clean up your cut material and take out any debris. You should also lock the blade. In an emergency, it is important to immediately shut off the power source.
There are many types of bandsaw blades
There are three main types: high-speed steel, carbon steel, and alloy steel. Carbon steel blades work best with soft metals. Alloy steel blades work better with harder metals. Both carbon steel and high-speed steel blades are designed for a variety of applications, including cutting curves and angles. Bi-metal blades work best with mixed metal materials. They are suitable for both flat stock, and pipe applications. Bi-metal blades are constructed of two metals welded to a flexible backer. They have a life expectancy of three to five year.
All-purpose blades can be used to cut soft materials like plywood. However, they can also work well for more difficult projects. These blades can be used to cut solid materials or bundles that are different sizes. These blades are great for cutting large quantities of material. For more intricate materials or cutting curves, however, you'll want to invest in specialist blades.
You need to check the tension of a bandsaw.
The blade must be properly tensioned if you plan to cut curves on your bandsaw. To verify that the blade tension is correct, turn the knob at the housing of the bandsaw. To release excess tension from the blade, turn it counterclockwise. Next, cut along the line so that the blade doesn't wobble. You risk damaging the blade by turning it counterclockwise.
Keep in mind that bandsaw blades are susceptible to a few thousandths of an inches shrinking the first time they're used. Keep this in mind and ensure that your bandsaw is properly tensioned before cutting. Also, remember to check the blade tension before changing woods. Bandsaw blades that are too tightened will likely break. Loose bandssaw blades can fall off the wheel and cause damage or splintering.
FAQ
How much should a skilled woodworker earn per hour?
The hourly rate of a professional woodworker depends on many factors including experience, skill level, availability, location, etc.
A skilled woodworker can expect an hourly rate of $20-50.
A less experienced woodworker may charge as little as $10 an hour.
How can I learn basic woodworking skills
A great way to start learning how to build furniture is by building a simple bench for yourself. You can do this project using any type of wood you have on hand at home. If you are unsure what type of wood is best, you can get cheap pine boards at Lowes (or Home Depot) instead. Once you have built your bench, you will need to sand it off and then finish it with a stain/varnish.
What would be your first step in woodworking?
Start with softwoods such as pine and poplar. After you are comfortable with the softwoods, move to hardwood.
How can I tell what kind of wood I am working with?
Always verify the label on wood purchases. It should have information about the wood species as well its moisture content and whether any preservatives were used.
Can this be a way to make money?
Yes! In fact, many woodworkers already do. According to the U.S. Bureau of Labor Statistics' (BLS), in May 2012 the median annual wage of woodworkers was $34,000 This is more than the national average of 31,000 per annum.
Statistics
- The best-paid 10 percent make $76,000, while the lowest-paid 10 percent make $34,000. (zippia.com)
- Average lumber prices rose about 600 percent between April 2020 and May 2021. (familyhandyman.com)
- Overall employment of woodworkers is projected to grow 8 percent from 2020 to 2030, about as fast as the average for all occupations. (bls.gov)
- If your lumber isn't as dry as you would like when you purchase it (over 22% in Glen Huey's opinion…probably over 10-15% in my opinion), then it's a good idea to let it acclimate to your workshop for a couple of weeks. (woodandshop.com)
External Links
How To
How to make wood joints
This tutorial will teach you how to join two pieces wood together. We will use the pocket hole joint, which is drilling holes in the wood to join them. This works well if the wood is straight and smooth. You might consider dowel joinery if your wood isn’t straight or flat. Here are the steps
-
Drill Pocket Hole Joints. To start, measure and mark where you want to put the pocket hole joint. With a handheld drill machine or jig saw, drill 3/4-inch deep holes in the ends of each piece.
-
Sand Smooth. Sanding the wood's edges will help ensure that the joint won't split later.
-
Glue Together Apply glue to both ends of the wood. Allow it to sit for approximately 5 minutes before you clamp the pieces together.
-
Fix the Pieces together. After the glue has dried properly, clamp the pieces together to make sure they are flush.
-
Trim Joinery. After the glue dries completely, trim off any excess wood around the joint.
Allow enough space between pieces so you can turn them inside out.