Lora S. Irish, an internationally-recognized artist, is the author of many books on carving including The Great Book of Carving Patterns. Woodcarving Illustrated and Scroll Saw Woodworking and Crafts both feature her. In this article, we'll introduce you to her latest collection of scroll saw patterns, North American Wildlife Patterns for the Scroll Saw. Irish has many publications beyond these books. Lora S. Irish is a popular blogger on Scroll Saw Woodworking.
Lora St. Irish is an international artist
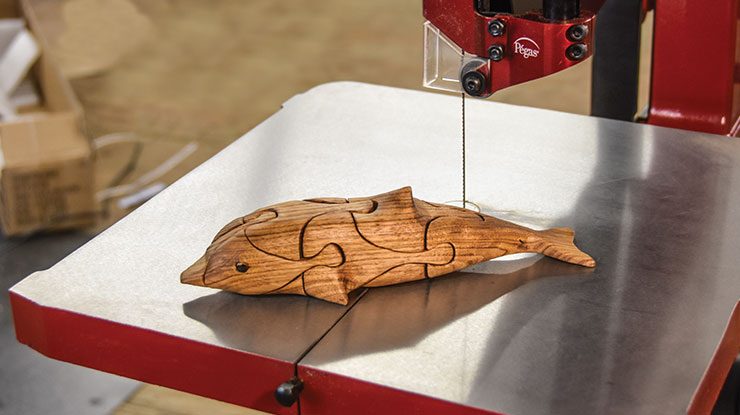
If you love animals and nature, then you'll love these wildlife patterns for scroll saw. These patterns are simple and easy-to-follow, with black-filled photos of the cuts. These designs are ideal for wall decoration, but they also have many practical uses, including decorating basket lids and adding interest to shelf braces.
The scroll saw patterns in this book were designed to showcase wildlife from around the world. More than 50 line patterns are available for you to choose. The patterns are easy to follow, and include basic cutting instructions to make the finished projects. The instructions include simple steps to get you started and a six page gallery of completed designs. Be sure to carefully read the instructions before you cut.
She is the author of North American Wildlife Patterns for the Scroll Saw

The book includes 61 stunning designs for the scrollsaw. These patterns provide clear, step-by–step instructions and simple-to-follow lines to cut. The book ships directly to the customer. You may make a copy for personal use, but you may not duplicate the pattern for resale or distribution. The patterns may be photocopied, scanned or printed for other machines.
This book is written by renowned artist Lora S. Irish. These patterns feature dragons as well as bears, deer, birds and many other animals. This guide gives detailed instructions on choosing blades, making inside and out cuts. This guide includes suggestions for how to adapt the patterns to your own needs. Irish's artistic talents span many mediums, including wood carving, and she is well-known for her intricate relief carving patterns. Her books have been featured by many magazines, and they are highly recommended.
FAQ
Is it easy to start a woodworking business?
It can be difficult to start your woodworking business. There are many requirements and regulations that must be followed. You don't have to go through all that hassle of setting it up. Many people join already-established businesses. This will allow you to avoid paying membership fees and taxes.
How often do I need to buy new supplies
Some tools will need to be replaced over time. Sharpening hand tools is a must. For power tools, replacement parts will be required frequently. Try spreading your purchases over a few months so you don't buy too many at once.
How much should a hobbyist invest to get started?
If you're looking to start your own woodworking business, you'll probably need some capital to buy the necessary tools and supplies. A good place to start would be by buying a small table saw, drill press, circular saw, jigsaw, and sanding machine. These items won't break the budget and aren't expensive.
Where do I get my woodworking supplies?
There are many places that you can find all the information you need. You could also visit hardware stores in your area or shop online at Amazon.com.
For furniture and other materials that you can reuse, check out flea markets and garage sales.
How much should a skilled woodworker earn per hour?
Hourly rates for professional woodworkers vary depending on many factors such as skill, experience, availability, geographical location, and other variables.
An average hourly rate for skilled woodworkers ranges between $20-$50.
A woodworker with less experience may be able to charge $10 an hour.
How long does a piece take to finish?
It depends on the wood type you choose, the complexity and the amount you apply to the finished product. Hardwoods are more difficult to maintain than softwoods. Hardwoods tend to be more expensive that softwoods. However, they are stronger and more resistant to moisture. Finishing furniture can take anywhere from one week up to three months.
What material would your recommendation be to learn woodworking?
You can start with softwoods like pine or poplar. These two are the easiest to master, then you can transition to hardwood.
Statistics
- Most woodworkers agree that lumber moisture needs to be under 10% for building furniture. (woodandshop.com)
- In 2014, there were just over 237,000 jobs for all woodworkers, with other wood product manufacturing employing 23 percent; wood kitchen cabinets and countertop manufacturing employing 21 percent. (theartcareerproject.com)
- Overall employment of woodworkers is projected to grow 8 percent from 2020 to 2030, about as fast as the average for all occupations. (bls.gov)
- Woodworkers on the lower end of that spectrum, the bottom 10% to be exact, make roughly $24,000 a year, while the top 10% makes $108,000. (zippia.com)
External Links
How To
How to stain wood
The process of staining wood involves the application of chemicals to the wood's surface, which causes it to change its color. This chemical reaction changes the wood's color from white to brownish. The most common type of wood used for staining is oak, although many other types of wood can be stained.
There are many ways to stain wood surfaces. One method involves mixing the stain and a solvent and then spraying it on the wood. Others use a solution made up of water and dye, which is then applied directly onto the wood. You can also mix stains with varnishes or paints so that they become part the finish coating.
Preparing the surface is the most important step in staining wooden surfaces. The wood must be thoroughly cleaned to remove all grease and dirt. Sanding smoothens scratches and rough spots. The next step is to determine the type of stain you would like to use. There are two main kinds of stains available: non-penetrating stains and penetrating. Penetrating colors penetrate deeper into wood than those that are non-penetrating. This makes them more suitable for darker colors, such as mahogany. Light colors such as maple work well with non-penetrating stain.
After choosing the type and application method you prefer, gather your tools. A paintbrush works well for applying stains because it allows you to spread the liquid evenly across the surface. You should also have some handy rags to wipe up excess stains after you finish painting. You should have enough containers to store the various components of the stain mixture if you intend to mix it yourself.
Once you have prepared all your materials, it is time to clean the areas where you will stain the wood. Use warm water and soap to clean away dirt and dust. Wipe down all furniture pieces with a dampened cloth and clean water. You should remove any debris, especially if your plan is to stain darker wood.
Apply the stain. Next, apply the stain to the furniture by starting at one end. Move slowly and carefully along the grain of your wood until you reach its opposite end. Make sure that the stain does not drip off the edge of the wood. Let the stain dry completely before proceeding with the next steps.
Clear polyurethane is used to protect the painted surfaces. Apply three coats of polyurethane sealer. Let the third coat dry overnight before you sand the final coat.