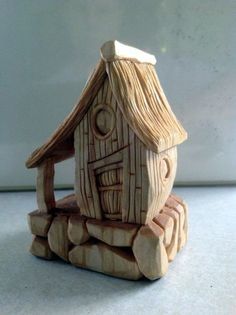
You can find several videos on woodcarving online. People enjoy watching Ian's videos because they show the techniques step by step. His videos are delivered in downloadable video files, and include photographs and plans. All buyers must be capable of viewing MPG videos or JPG images. He also offers books that will teach you how to carve different materials. Ian Norbury's Fundamentals of Woodcarving provides an example.
Fundamentals of Woodcarving
It may be helpful to take a fundamentals course if you are new to woodcarving. This class will help you learn the fundamentals of carving. It is tailored to your level of experience. Before diving into advanced woodcarving techniques, you will be taught about safety, woodworking tools, wood finishes, and basic woodcarving skills. This class will teach you how to carve a human face or an eagle and Christmas ornament. Additionally, you will learn about grain direction as well as clever ways to cleanly remove wood.
If you've always wanted to learn how to carve flowers or fruit, you might be interested in taking a woodcarving class. If you have a talent for the craft, it will not be difficult to learn the basics. No matter what level you are at, you can learn the basics and design process in an enjoyable and relaxed atmosphere. An experienced woodcarver can tell that you can learn woodcarving by working with a teacher.
Ian Norbury
Ian Norbury's woodcarving videos are like peering over the shoulder at a master carver. Each video walks you through the process step-by-step, demonstrating the techniques he has developed in his fifty years of carving. These videos offer detailed instruction and a money back guarantee. They can be downloaded at any time, and you can watch them as many times or less as you like.
You can use the DVD as a guide or training tool. These videos provide step-by-step instructions as well as clips of Ian Carving. This allows you to see the entire process, from start through finish. Ian's teaching style is simple and easy to follow. He will show you how to carve or portray a character in a myth. There are more videos than two hours to choose from and each can help improve your technique.
Frank Russell
Frank Russell's woodcarving videos will help you whether you are a beginner or an intermediate carver. His techniques cover many subjects including woodcarving animals as well as birds and plants. He also shows you how to shape and clean bits. The videos cover the actual process of carving, as well as visual concepts. Frank Russell's videos also can be streamed online or on DVD. Fur, Feathers or Fins will provide a comprehensive guide for carving birds of all kinds.
Woodcarving videos by Frank Russell are excellent resources for beginner and advanced carvers alike. These videos have detailed instructions for both beginners and advanced carvers. They are made using Foredom Woodcarving Kits. A Cotton Tail Rabbit carving video is also included in the series.
Scott Phillips
Scott Phillips woodcarving videos are a great resource for anyone interested in woodcarving. Scott Phillips woodcarving skills are featured on the PBS program "American Woodshop." He talks about his first woodcarving experience, the time he used his father's expensive walnut boards, and how his love of baseball inspired him to turn his first decorative jewelry box. Scott is also known for his woodcarving videos. He has written a book about the history and evolution of the shuttle program. His upcoming book, "Remove Before Flight" will also detail the history of this program. While his woodcarving skills have taken off, Scott still builds Adirondack and clock-like furniture.
Kevin Coates
Kevin Coates has some great videos for woodcarving if you like carving. His YouTube channel has almost 7 million views and 26,000 subscribers. Many woodcarvers have been inspired by his videos to create their own woodcarving videos. To learn how to carve a piece of your own art, watch these videos. These videos feature carvings by Kevin Coates and other well-known carvers. These videos are sure to inspire you.
FAQ
Where can I start woodworking?
It is best to actually build furniture to learn how to make it. While you will need tools and make mistakes, you will eventually master the art of building furniture.
Begin by choosing the project that you want to finish. It can be something as simple and small as a box, or large-scale as an entertainment center. After you have decided on a project to work on, contact a local woodworker that specializes in this type of work. Ask him or her for advice on what tools you'll need and where to find them. It's possible to ask your friend if they do this type of work.
Is it easy to start a woodworking business?
Starting your own woodworking business isn't easy. There are many laws and regulations you need to be aware of. This doesn't necessarily mean that you should go through all the work of setting up a company. Many people opt to join existing businesses instead. You only need to pay membership and tax fees.
How can I learn basic skills in woodworking?
The best way to learn how furniture construction is to make your own bench. This project can easily be done using whatever wood you have at your house. If you are unsure what type of wood is best, you can get cheap pine boards at Lowes (or Home Depot) instead. After you've constructed your bench you'll want sand all the rough edges off and varnish it.
Statistics
- Most woodworkers agree that lumber moisture needs to be under 10% for building furniture. (woodandshop.com)
- Overall employment of woodworkers is projected to grow 8 percent from 2020 to 2030, about as fast as the average for all occupations. (bls.gov)
- The best-paid 10 percent make $76,000, while the lowest-paid 10 percent make $34,000. (zippia.com)
- Woodworkers on the lower end of that spectrum, the bottom 10% to be exact, make roughly $24,000 a year, while the top 10% makes $108,000. (zippia.com)
External Links
How To
How to stain wood
Staining wood is the process of applying chemicals to the wood's exterior, which alters its color. The wood will turn from white to brownish-red due to the chemical reaction. While oak is the most widely used type of wood for staining purposes, other types of wood are also available.
There are many methods to apply stain to wood surfaces. Some methods involve mixing the stain with a solvent (such as turpentine) and then brushing or spraying the mixture onto the wood. Some methods involve a mixture of water and dye that is applied directly to the wood. You can also mix stains with varnishes or paints so that they become part the finish coating.
Preparing the wood surface is the first step to staining it. To apply the stain, clean the wood completely. Sanding the wood smooths out rough spots and scratches. Then you must decide what kind of stain you want to use. There are two main types of stain: non-penetrating and penetrating. Penetrating stains penetrate deeper into the wood than non-penetrating ones, making them ideal for dark colors such as mahogany. Light colors such as maple work well with non-penetrating stain.
After you've decided what type of stain to apply, get ready for your tools. Paintbrushes are great for applying stain because they allow you to evenly spread the liquid across the surface. To remove any stains left behind after painting, you will need some rags. If you are planning to mix your stain, ensure you have enough containers for each component.
After you have prepared the materials, you can clean the area where you want to stain the wood. You can remove grime and dirt with warm water and soap. Use a dampened sponge and warm water to clean the entire piece. Be sure to get rid of all loose material, especially if staining is planned for darker wood.
Next, spray the stain. Apply the stain by brushing or spraying it onto one side of the furniture. You should work slowly and carefully. Continue moving along the grain until you reach your opposite end. You must be careful not to allow the stain to drip off the wood's edges. Before moving on to the next steps, allow the stain drying completely.
To protect the painted surface, apply a coat of clear polyurethane sealant. Apply three coats of polyurethane sealer. Allow the third coat to dry overnight, before sanding.