There are several different types of dovetail tools. Dovetail tools are usually made with an included angle 90 degrees. In the figure 3, you can see two 0.100 inch-dia. There are many options for dovetails tools, including different neck diameters and included angles. They are suitable for many applications and can be purchased in different sizes. This article will discuss the differences and compare the two types.
Dovetail milling cutter
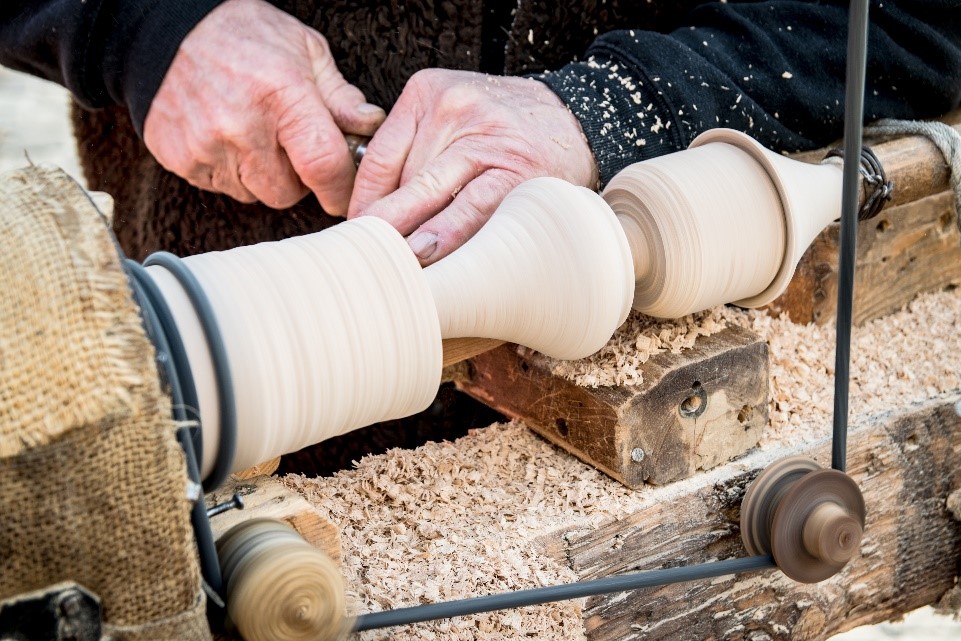
Dovetails are pieces made of wood that are arranged in parallel on a lathe. These are also known by the name jigs. They can be used in manufacturing but not automotive. In fact, dovetails are the most common woodworking tools. However, the dovetail tool is not just a woodworking tool. It can also be used in optical systems.
Dovetail milling cutters are a type of chamfering instrument used to create reliefs or bevels on the stock's underside. You can also use it to flat-burr an aluminum piece. These tools are commonly micro-grain carbohydrateside and can be ordered in a range of lengths, cutting diameters, and geometries.
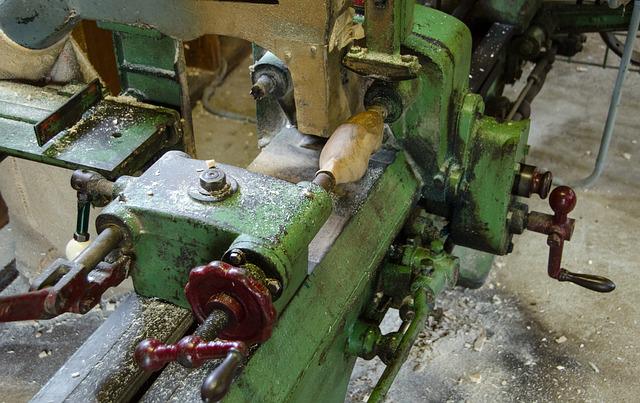
For holding small pieces of workpieces, vices can be used in conjunction with dovetail lathes. These vices can also be used to machine on a table at angles up to 90 degrees. Dovetails can also be milled in the opposite direction. The first dovetail must always be cut parallel to it, while the second must be 90 degrees from the original.

Dovetail tools that are too large for their dovetails can often be difficult to use. This results in inaccuracies in surfaces, and sometimes instantaneous tool failure. Dovetail cutters, however, are smaller than the standard end-mill and have a smaller neck. In other words, dovetail lathe tools should be chosen with care, and the tool should be selected appropriately.
Dovetail chisel
A good dovetail knife will make it much more easy and help ensure that your joint is flat and square. A good dovetail saw will allow you to get a better angle for cutting dovetail tailboards. Ashley Iles has created a high-quality dovetail tool that is triangular in cross section and flexible for ease of use. These chisels can also be ordered with an oiled cloth at the bottom of the pocket.
Using a good dovetail chisel will help you create a dovetail recess quickly and efficiently. It features a triangular blade cross section that can be used to fit into tight corners of a dovetail. Its hollow back provides maximum holding power. The chisel also comes with a handy marking scale to determine the proper diameter of the dovetail.
An umeki-nomi is another useful dovetail tool. This traditional Japanese chisel excels at removing dovetail waste. This tool features a triangular shape with sharp edges. The blades are made out of both hard, high-carbon Hitachi white steel (on the face) and soft steel (on the back). The blades are made by a master blacksmith in Japan, Takao Shibano, and are backed by over 50 years of toolmaking experience.
Nova Dovetail Chisel
To get the best dovetail lathe results, you will need a dovetail-chisel. The Nova Dovetail Chisel cuts the dovetail recess for your dovetail jaws. The dovetail-chuck chuck will be able to hold it well because of its unique shape. Some chisels don't have the same dedicated design, which can result in poor dovetail shape and improper seating. The chisel comes with a handy scale that measures the exact diameter of the dovetail recess. It cuts dovetails to fit both 50mm (2") as well as 100mm (4") jaw sets.
The NOVA Dovetail Chuck Accessory makes it possible to create a dovetail groove for your dovetail chucking. The NOVA Accessory Jaws match perfectly, ensuring a precise cut with a comfortable grip. The NOVA Dovetail Chisel by Teknatool International is backed with a two year replacement warranty.
Nova Dovetail Chisel has another advantage: It is simple to use. It doesn't require the Turner to maintain the bevel edge of the dovetail chisel. This is the hardest part of dovetail machining. It is suitable for both beginners as well as experts. The Nova Dovetail Chisel's sharpening is simple.
FAQ
What is the minimum investment a hobbyist needs to make in order to get started?
A lot of capital is required to purchase the necessary supplies and tools if you want to start your own woodworking shop. The best place to start is by buying a small drill press, circularsaw, circular saw or sanding machine. These items aren't very expensive, so you won't break the bank.
What is the difference in a hobbyist and professional woodworker?
Hobbyists like making things with wood. Professionals focus more on quality. Hobbyists often take pride in the creations they make and often share them to family and friends. Professionals will spend hours researching designs and then begin to create a project. Professionals will be meticulous about all aspects of their work, from selecting the right materials to finishing it.
How can a novice woodworker make it big?
Many people learn how to make furniture in order to set up an online business. You don't have to sell on Etsy if your furniture is just beginning. Local craft fairs and events are great places to sell your products. A workshop could also be offered for people who are interested to learn how they can build their own furniture. If you have the experience to be a carpenter, builder, or a designer, you may consider offering your services in remodeling homes or creating custom pieces.
What wood items do well?
Most wooden items that are best-sellers are made from wood harvested sustainably.
Maple, cherry, mahogany walnut, teak, mahogany and maple are the most common woods for furniture.
These woods have beautiful grain patterns and colors. They are also very strong. They are also very durable if properly maintained.
To prevent moisture damage, wood furniture should always first be painted. This covers all surfaces, drawers included, as well as doors and handles.
You want your furniture to last as long as possible so you need to choose a paint that is water resistant.
It is recommended to use an oil-based primer, then apply two coats. Depending on how much wear you expect, you might need to apply more coats of topcoat.
Spray cans or aerosol paints should be avoided. These products contain solvents which evaporate quickly and leave behind harmful fumes.
Statistics
- In 2014, there were just over 237,000 jobs for all woodworkers, with other wood product manufacturing employing 23 percent; wood kitchen cabinets and countertop manufacturing employing 21 percent. (theartcareerproject.com)
- The U.S. Bureau of Labor Statistics (BLS) estimates that the number of jobs for woodworkers will decline by 4% between 2019 and 2029. (indeed.com)
- Overall employment of woodworkers is projected to grow 8 percent from 2020 to 2030, about as fast as the average for all occupations. (bls.gov)
- Average lumber prices rose about 600 percent between April 2020 and May 2021. (familyhandyman.com)
External Links
How To
How to drive a nails in wood
To drive a nail into wood, the first step is to select the right size and type hammer. There are many types of hammers that you will find: claw hammers and sledgehammers; mallets; ball peen hammers; and hatchets. Each type of tool has its advantages and drawbacks. A claw hammer works well when you're trying to hit nails with a heavy hammer. However it is difficult to precisely control where the blow hits. A sledgehammer allows you to hit large areas simultaneously, but it is too heavy and cumbersome to use for small tasks.
Once you have chosen the right hammer for you, put your hand flat against its side so that it rests comfortably in the palm of your hand. You can grip the handle with your fingers, but not so tight that it causes injury. Keep your wrist relaxed and the hammer straight up. You should then swing the hammer straight up, keeping your wrist relaxed. You should feel the impact of your hammer hitting the nail. Practice swinging your hammer on a block of wooden until you feel comfortable.
You can now drive the nail by holding the hammer to your body. The nail should be perpendicular to wood's surface. Keep your focus on the tip of each nail. Move the hammer forward and then continue to move the hammerhead. Keep doing this until you are comfortable with the swing. After mastering the technique, you can add power to your swings. Hold the hammer high above your shoulders and pull it down. This will allow you to exert more energy.
Once you have made the first hole, remove your hammer. To pull out the remaining nails, use a screwdriver or pry bar. Keep the nails heads in line with the surface of the board to prevent splitting the wood.