
When it comes to installing a face plate, there are some basic steps to follow. These include selecting the right dimensions, screw sizes, and material. Once you have all these elements down, it's now time to install your faceplate. Continue reading for instructions on how to install your faceplate. It's easy to put in and it will make your lathe work as expected. Listed below are the steps to installing a face plate.
Dimensions
The faceplate, a primitive accessory, can hold any shape very accurately. In addition to wood, face plates can be made from light alloys or temporary materials. These faceplates can be used for temporary purposes or to hold difficult jobs. The workpiece can be attached using wood screws to thread the holes on a wooden wooden faceplate. This arrangement is much more common in industrial lathes than in home workshops.
It is crucial to know the dimensions of your faceplate. The faceplate should not be smaller than the blank. If you're planning on using it for different purposes, make sure the screws will not interfere with one another. A hole is provided for a wrench. The faceplate should have slots to accommodate a tommybar and holes for an adjustable wrench. It is possible to view the faceplate for each tool.
Material
The faceplate for a lathe can be made of a variety materials, including aluminum and cast iron as well as steel and welded structures. Face plates can be made from a variety of materials. It is important that you consider their properties when choosing a material. Below are some considerations for choosing a faceplate material. Specific material properties are important to ensure precision and durability in the design process. Cost optimization can also be achieved by evaluating the face plates made of different materials.
A faceplate for lathes is typically made of polymeric materials and has a circular surface. The faceplate is typically made from a polymeric material and has indicia lines, a plane front, and recesses that allow for the chucking of the workpiece. Some faceplates have fasteners located in inserts of contrasting color. This serves to warn the user if a fastener gets loose.
Screw size
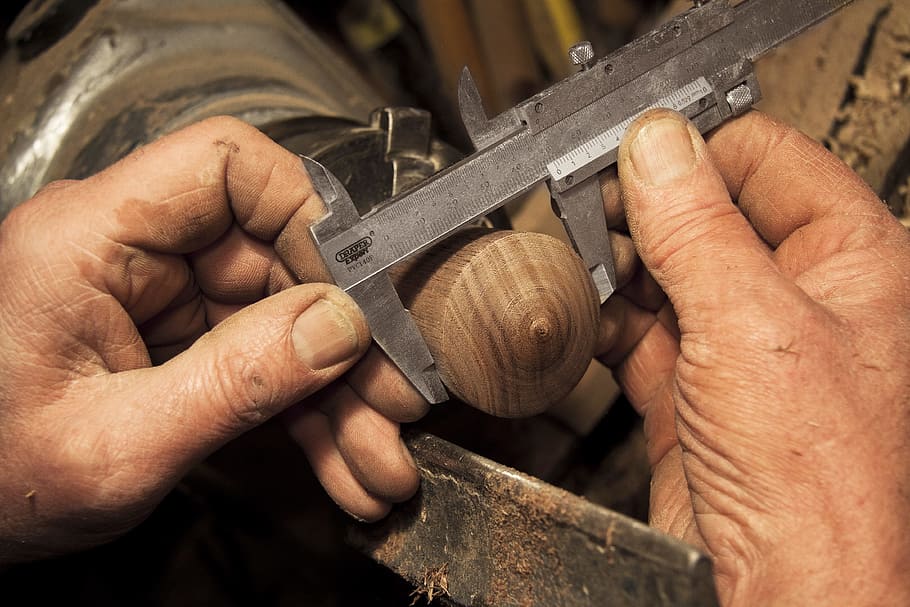
Consider using a smaller screw size if you have a wood lathe. Because your screw size will affect the space available for your threads, If you use a bigger screw diameter, the screw will protrude from the faceplate and can cause damage. A slightly concave faceplate may be an option depending on the size of your lathe.
Faceplates come in many sizes and materials. The smaller versions can be made of an alloy, while larger ones can be made from steel. The faces of the alloy can become damaged over time. Experienced turners also know how to mount their blanks to keep them from getting too loose and prevent them being turned. However, novices may try to turn blanks that are too large or too close to their tools.
Installation
Before you mount the faceplate onto your lathe's head, make sure to disconnect the power source. Next mount the faceplate to the workpiece. Turn the spindle clockwise until the faceplate turns. Once the faceplate in position, engage its spindle lock. Then turn the faceplate clockwise until the spindle turns freely. Disengage the spindle locking mechanism by turning the lathe counterclockwise until the faceplate stops.

A faceplate is a flat, round, threaded plate on the front of a lathe. It accepts clamps or other fastening devices because of its slotted surface. Once the workpiece has been positioned on a faceplate, it can be secured using either the slots of the clamps or by screwing it directly into the faceplate threads. Once the workpiece is in position, the faceplate is screwed to the lathe spindle.
FAQ
What material would you recommend to start learning woodworking?
Start with softwoods such as pine and poplar. You will feel more comfortable with these softwoods, so you can move onto hardwood.
How can I learn basic woodworking skills
It is an excellent way to learn how to build furniture. You can make a simple bench yourself. You can do this project using any type of wood you have on hand at home. If you don't know what kind of wood to use, then go ahead and buy some cheap pine boards from Home Depot or Lowes. After you've constructed your bench you'll want sand all the rough edges off and varnish it.
Are there any other things I should know regarding woodworking?
It's easy to underestimate the amount of work involved in making furniture. Finding the right wood for the project is the hardest part. It is difficult to choose between the various types of wood.
A problem is that wood doesn't have the same properties. Wooden can split or crack, while some woods may warp. These factors should be taken into account before buying wood.
What tools are used by carpenters?
A hammer is probably the most widely used tool for carpenters. A hammer helps to carpenter pound nails into the wood. It also helps them hold pieces together while they are working on a project. Other tools include clamps.
Is it difficult to start my woodworking business?
It is difficult to start your own woodworking company. There are many laws and regulations you need to be aware of. You don't have to go through all that hassle of setting it up. Many people join already-established businesses. This allows you to join existing businesses and pay only membership fees.
Where can I begin with woodworking
You can learn the most effective way to build furniture by actually building it. Although you will need to have tools and may make mistakes along your journey, you'll soon be able to master it.
Start by choosing a project you'd like to complete. It could be something as simple as a box or as elaborate as a full-scale entertainment center. Once you have chosen a project, locate a local woodworker who is skilled in this kind of work. Ask him or her for advice on what tools you'll need and where to find them. It's possible to ask your friend if they do this type of work.
Statistics
- If your lumber isn't as dry as you would like when you purchase it (over 22% in Glen Huey's opinion…probably over 10-15% in my opinion), then it's a good idea to let it acclimate to your workshop for a couple of weeks. (woodandshop.com)
- Woodworkers on the lower end of that spectrum, the bottom 10% to be exact, make roughly $24,000 a year, while the top 10% makes $108,000. (zippia.com)
- Average lumber prices rose about 600 percent between April 2020 and May 2021. (familyhandyman.com)
- The U.S. Bureau of Labor Statistics (BLS) estimates that the number of jobs for woodworkers will decline by 4% between 2019 and 2029. (indeed.com)
External Links
How To
How to make wooden joints
This tutorial will teach you how to join two pieces wood together. We will be using the "pocket-hole joint", which involves drilling holes in wood and then gluing them together. This method works great if your wood is straight and smooth. Try dowel joinery instead if your wood doesn't look straight. Here are the steps
-
Drill Pocket Hole Joints. To start, measure and mark where you want to put the pocket hole joint. Use a jigsaw or handheld drilling machine to drill 3/8 inch deep holes at the ends of each wood piece.
-
Sand Smooth. You can sand the edges of the wood to ensure that it doesn't split.
-
Glue together. Apply glue to both ends of the wood. Let it sit for about 5 minutes before clamping the pieces together.
-
Fix the Pieces together. After the glue has dried thoroughly, secure the pieces so that they are flush.
-
Trim Joinery. After the glue dries, trim any excess wood around your joint.
Make sure to leave enough room between the pieces so that you can turn them inside and out.