You'll need to use glue when gluing boards together. Glue can also be applied to one side of a joint. A roller makes it easy to apply a thin layer of glue. After the glue has been applied, let the boards cure for at most 24 hours before you move on to the next step. Any oozing glue can be cleaned with a damp cloth during the curing process, and any excess glue will need to be removed with a chisel or sandpaper. Be sure to give your curing time enough!
Glue boards can be used from both ends
The finished product will be flat and even if glue boards are used from both sides. Be patient and don't rush the process. This is a delicate task so you should take it in steps. Here are some tips to help you get it done successfully. Your board should be flat and level. It shouldn't buckle. You should use the right amount of adhesive.

Applying a bead of glue to both edges of a joint
Many benefits can be gained from gluing joints. It makes joints stronger and prevents them from cracking or breaking. The glue is invisible so edges are smooth and straight. Also, spread a generous amount glue evenly throughout the joint. Applying clamps at regular intervals along the joint will help create overlapping "cones of pressure" along the joint. This technique ensures a thin, strong glue line. Another option is lap joints, which provide a wide range of gluing surfaces. For this type of joint, the following techniques are recommended.
A board can be made thicker by adding thickness
You should always add thickness to your boards when gluing them together. If you don't, the wood pieces will look plywood-like. Your finished product will have a different look if you use multiple layers. You must pay attention to the grain when gluing multiple boards together. A bad match of grain will ruin your project's beauty. You can avoid this by buying boards from the exact same log with a bit more waste. Stock that you already have can be used.
A caul can be used to glue boards
Gluing boards can be tricky, and using a caul is an effective way to ensure a flat surface and a strong bond. A caul is simply an arbitrary piece of wood that you clamp parallel to the top edge of your table. Cauls should only be made of hardwood, and should be thicker around the glue seam. A caul can be used to attach glue boards in many ways.
Avoid Flex in the cauls
To prevent bowing, avoid flexing the cauls when gluing boards together. Cauls are curved, so when done up, they apply inward pressure. Even if the boards are symmetrical, this can lead to edge to edge boards bowing. This can be fixed by making sure the edges are square and using a proper adhesive.
Creating mirror image grain patterns with edge-glued boards
Edge-glued boards are made of two pieces of wood combined with mirror image grain patterns. They're most often used for veneers, but can also be created from solid boards. This involves resawing one wood piece and then joining it with glue. Here are a few easy ways to achieve this effect. Read on to learn more.
FAQ
How much should a skilled woodworker earn per hour?
The hourly rate of a professional woodworker depends on many factors including experience, skill level, availability, location, etc.
The average hourly rate for a skilled woodworker ranges from $20-$50 an hour.
A woodworker with less experience may be able to charge $10 an hour.
Do you have any other information I should know about woodworking and/or the process of making it?
It is easy to underestimate the amount work involved with furniture construction. Finding the right kind of wood is the most difficult part. There are so many varieties of wood available that choosing one can be difficult.
Another problem is that not all wood has uniform properties. Wooden can split or crack, while some woods may warp. These factors should be taken into account before buying wood.
How long does it usually take to complete a piece furniture?
It depends on the wood type you choose, the complexity and the amount you apply to the finished product. Hardwoods require more care than softwoods. Hardwoods are more expensive than other woods. They are more durable and can withstand moisture better. Finishing furniture can take anywhere from one week up to three months.
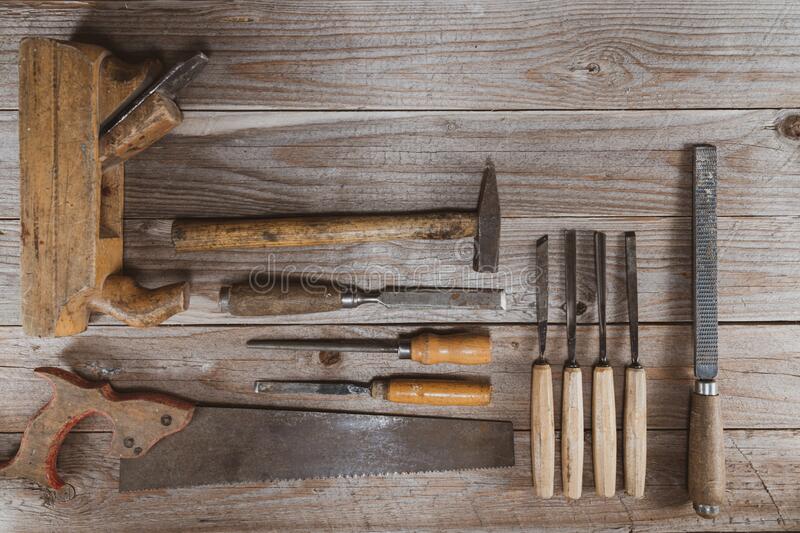
What kind tools do carpenters use to build?
Carpenters use a hammer as their most common tool. A hammer is used for pounding nails into wood. It also helps them hold pieces together while they are working on a project. Other tools include clamps and pliers, screwdrivers as well as measuring tape, pencils and saws.
Can I make my living doing this job?
Yes! Many woodworkers are already doing so. According to the U.S. Bureau of Labor Statistics in May 2012, the median annual income for woodworkers was $34,000 This is significantly higher than the national average, which is $31,000 per year.
How can I learn basic woodworking skills
A great way to start learning how to build furniture is by building a simple bench for yourself. This project can be completed with whatever wood you have available at home. If you don't know what kind of wood to use, then go ahead and buy some cheap pine boards from Home Depot or Lowes. You'll need to sand the bench after it's built. Then, finish it with varnish or a stain.
Statistics
- The best-paid 10 percent make $76,000, while the lowest-paid 10 percent make $34,000. (zippia.com)
- Overall employment of woodworkers is projected to grow 8 percent from 2020 to 2030, about as fast as the average for all occupations. (bls.gov)
- The U.S. Bureau of Labor Statistics (BLS) estimates that the number of jobs for woodworkers will decline by 4% between 2019 and 2029. (indeed.com)
- In 2014, there were just over 237,000 jobs for all woodworkers, with other wood product manufacturing employing 23 percent; wood kitchen cabinets and countertop manufacturing employing 21 percent. (theartcareerproject.com)
External Links
How To
Tips on how to drive a nail in wood
The first step in driving a nail into wood is to choose the correct size and type of hammer. Claw hammers include mallets, claw hammers (sledgehammers), mallets, ball-peen hammers, hatchets, and mallets. Each type has its strengths and weaknesses. A claw hammer is best for hitting nails or hard objects. However, it can be difficult to pinpoint exactly where the blow will land. Although a sledgehammer can be used to hit large areas quickly, it is too heavy to be useful for small tasks.
After you've chosen the right tool, hold your hand flat to the handle so it rests comfortably in one of your palms. Grab the handle tightly, but do not squeeze too hard. Keep your wrist relaxed and the hammer straight up. Next, swing the hammer toward the ground and aim for the nail's center. You should feel the impact of the hammer striking the nail. Try practicing with a block to help you master the art of swinging a stick.
When you're ready to start driving the nail, hold the hammer in front of you close to your body. The nail should be perpendicular to wood's surface. Keep your eyes on the tip. Then, swing the hammer forward. Next, follow the motion of your hammerhead. Continue this motion several times, slowly increasing the speed of each swing. Once you have mastered this technique, increase the power of your swings. Then, raise the hammer from your shoulder to bring it down. You will be able to use more energy and put your best foot forward.
After you have nailed the hole, take the hammer off the nail. To pull out the remaining nails, use a screwdriver or pry bar. Keep the nails heads in line with the surface of the board to prevent splitting the wood.