
You can begin with the basics if you are a beginner in whittling. You will need a knife and wood. This article will cover tools, techniques, as well as wood types. Once you have the basics, you can begin your own whittling projects. There are many whittler project options.
Wood
There are thousands of different types of wood. However, these four woods will be most effective for whittling. If you are just starting to whittle, the woods on this list will help you get the hang of the craft. There are many methods to whittle wooden pieces to make different shapes. Here are some simple methods for whittling wooden objects.
The pull stroke is when you carve wood. Keep the blade parallel with the grain. This will help avoid damaging the wood. You can tell which direction the grain is by looking for dark streaks throughout the wood. The direction of these streaks is the direction that the blade will cut when whittling the wood. The push stroke will cut through wood more effectively than the pull stroke.
Knife
If you're new to woodworking, whittling with a knife can be a good way to try your hand at the craft. Even though you may not be an expert, mastering the technique will allow you to control the knife better and make precise cuts. Practice the pull stroke, for example, by cutting small strips with a knife soap. Practice makes perfect. It is easier to tackle beginner projects, and they become more challenging as you go along.
You will need a knife before you start whittling. A pocket knife works well because it's sharp enough for shavings. Avoid knives with large, long blades. These can lead to choking. You should choose a narrower blade to make it easier and faster to sharpen. If you need to, you may also want to use a frame saw.
Techniques
These techniques can help you improve your skills in whittling. The pull stroke is the most common. It involves bracing the right thumb against the wood and pinching the right fingers. Then you will draw the knife towards your right thumb while maintaining the knife straight. This stroke is fast and controlled and allows you to have a lot more control over the blade. This is best for intricate cuts.
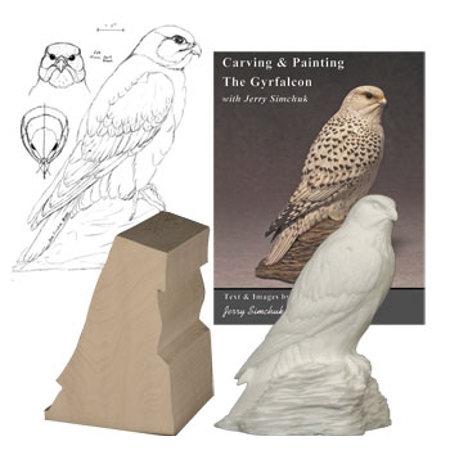
There are two primary types of whittling books. The Old Time Whittling books are the most popular. This book is great for beginning whittlers. The Little Book of Whittling contains many useful whitling suggestions. Many whittling ideas can be found in The Whittling Handbook. The Art of Whittling includes some more advanced projects. This book includes simple puzzles and patterns like ball and cage.
Tools
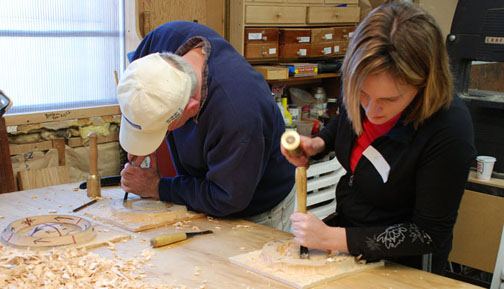
The first step in making whittling tools is to find good wood for your projects. While you can use wood from the street, it is better to have your own greenwood. It is much easier to carve greenwood than dry wood. Deadfall branches can be collected at any time. You can collect small trees at any time, but it's best to cut them in winter. Ask permission before you start collecting wood if your work is on private property.
There are many great sets for beginners. One set that is great for beginners is the Delicacy carving set. It includes 12 tools and a blank wood spoon. Protective gloves and a carrying case are included with the set. A set of whittling instruments is worth the investment, as you will be using them for many years. This set can also be used to start.
Starter projects
Start with a simple project if you are just starting out in wood whittling. You can progress to more complicated projects like carving faces on walking stick. Beginner whittlers may find comfort in a bird like the Comfort Birdie. A swan is an excellent beginner project in whittling. These make great gifts for children, and they are simple to make even for beginners.
A carved ball inside a cage is another beginner project. You can create complex designs and match feathers with your theme. Tiki idols can also be created. While there are many ways to create Tiki idols and woodland spirits, it's always good to have a template in place before you begin. You'll be able to identify which tools are best and what parts you don't need.
FAQ
How do you calculate woodworking prices?
It is essential to calculate costs as accurately as possible when pricing any project. You should always try to make sure that you are getting the best deal on materials. Also, consider all other factors that can affect the price of your projects such as skill level, experience, time and cost. Our guide to the average household DIY task price will give you an idea of how much it costs to complete different types of woodwork projects.
How do I get started with woodworking?
Learning how to build furniture is the best method. You'll need tools, and you'll have to make mistakes along the way, but if you keep at it, you'll eventually figure out what you're doing.
Start by choosing a project you'd like to complete. It can be as simple as a small box, or as complex as a complete entertainment center. Once you have chosen a project, locate a local woodworker who is skilled in this kind of work. Ask them for their advice about the tools and where they can be found. Perhaps you could ask if there is someone else who does this type of work.
How much money will I need to get started?
Each project is unique so there aren’t exact numbers. Here are some factors to help you estimate how much money you will need.
-
Material costs
-
Tools and equipment
-
Time spent on the project
-
Hourly rate
-
How much profit do you expect to earn
-
You can hire help, regardless of whether you have a plan.
Start small, if possible. You can make simple boxes or picture frames if you're just getting started. As you gain experience, you'll be able to tackle more complex projects.
Does it take a genius to make woodworking work?
No. No. Woodworking isn't rocket science. You can create beautiful pieces of art by learning how to use simple power tools.
Can I refinish my own furniture?
Yes! You don't have to hire a professional to refinish furniture. There are many ways you can do it yourself. Here are a few ideas:
Use sandpaper to remove scratches and stains. Finally, use a clean cloth or sponge to clean the surface.
Apply clear polyurethane varnish. Before moving furniture, let dry completely.
Use acrylic paint to paint furniture.
Use stain instead of paint. Furniture will look richer with the stain.
Use shellac wax. You can protect your wood with wax and give it shine.
Statistics
- Most woodworkers agree that lumber moisture needs to be under 10% for building furniture. (woodandshop.com)
- The best-paid 10 percent make $76,000, while the lowest-paid 10 percent make $34,000. (zippia.com)
- If your lumber isn't as dry as you would like when you purchase it (over 22% in Glen Huey's opinion…probably over 10-15% in my opinion), then it's a good idea to let it acclimate to your workshop for a couple of weeks. (woodandshop.com)
- The U.S. Bureau of Labor Statistics (BLS) estimates that the number of jobs for woodworkers will decline by 4% between 2019 and 2029. (indeed.com)
External Links
How To
How to stain wood
Staining wood is the process of applying chemicals to the wood's exterior, which alters its color. The wood will turn from white to brownish-red due to the chemical reaction. Oak is the most commonly used wood for staining, but other woods can also be stained.
You can apply wood stains in many different ways. One method involves mixing the stain and a solvent and then spraying it on the wood. You can also apply a solution containing water and dye directly to the wooden surface. It is possible to mix stain into varnishes and paints, making it part of the finishing coat.
Preparing the wood surface is the first step to staining it. Cleaning the wood thoroughly removes any dirt or grease that could interfere with applying the stain. Sanding can smoothen out scratches and uneven spots. The next step is to determine the type of stain you would like to use. There are two types of stains that can be used: penetrating and non-penetrating. Penetrating colors penetrate deeper into wood than those that are non-penetrating. This makes them more suitable for darker colors, such as mahogany. Non-penetrating oils work best when used with light colors, like maple.
After choosing the type and application method you prefer, gather your tools. A paintbrush works well for applying stains because it allows you to spread the liquid evenly across the surface. A few rags are also handy to clean up any spillages after you have finished painting. If you plan on mixing the stain yourself make sure that you have enough containers to hold the different components.
After you have prepared your materials, clean the area you intend to stain. Use warm water and soap to clean away dirt and dust. Use a dampened rag and clean water to wipe the furniture. You should remove any debris, especially if your plan is to stain darker wood.
Next, apply the stain. Next, apply the stain to the furniture by starting at one end. You should work slowly and carefully. Continue moving along the grain until you reach your opposite end. Be careful not to let the stain drip off the wood's edge. Allow the stain to dry completely before you move on to the next step.
To protect the painted surface, apply a coat of clear polyurethane sealant. Apply three coats with polyurethane. Allow the third coat, which should dry overnight, to dry before sanding.